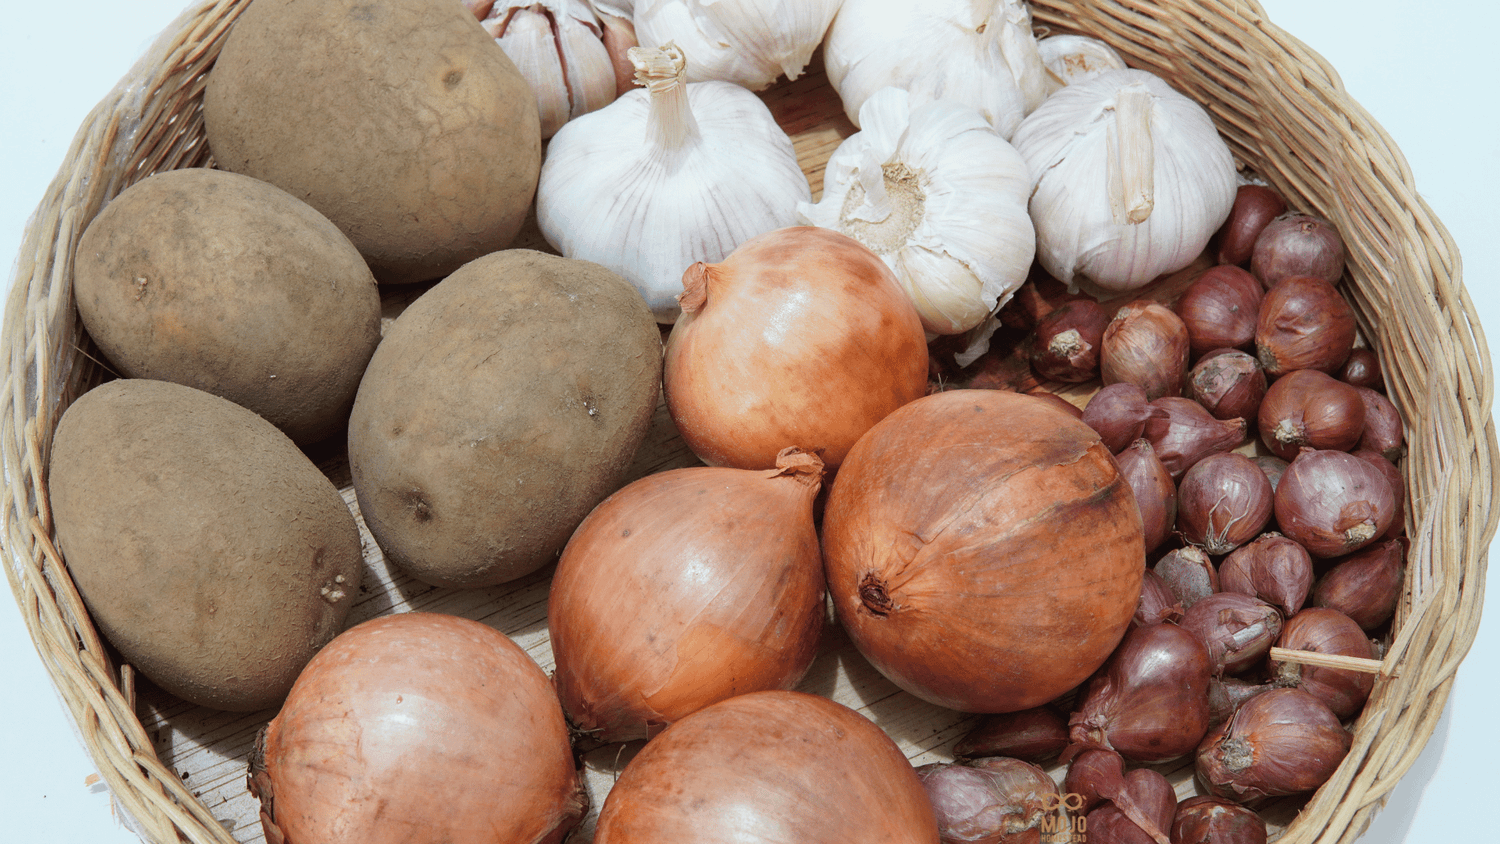
Potatoes, Garlic & Onions
Potatoes, Garlic & Onions: The Easiest Autumn Crops You're Not Growing Yet
If you only grow three things this autumn, make it these.
Potatoes, garlic, and onions are genuinely some of the most satisfying, low-fuss crops you can put in the ground — and right now, in autumn, is exactly the right time to do it. Miss this window and you'll be waiting another year. Get them in now and future you will be very, very happy come spring.
Here's why timing matters: garlic and onions actually need a cold period to develop properly.
That cold snap over winter is what triggers them to bulk up and form those big, beautiful bulbs.
Potatoes planted in autumn get established before the frosts hit, then absolutely take off once spring arrives.
So don't sit on this one — the window is open right now.
Potatoes: The Most Satisfying Crop You'll Ever Grow
There is something deeply joyful about digging up a pile of spuds you grew yourself. It never gets old.
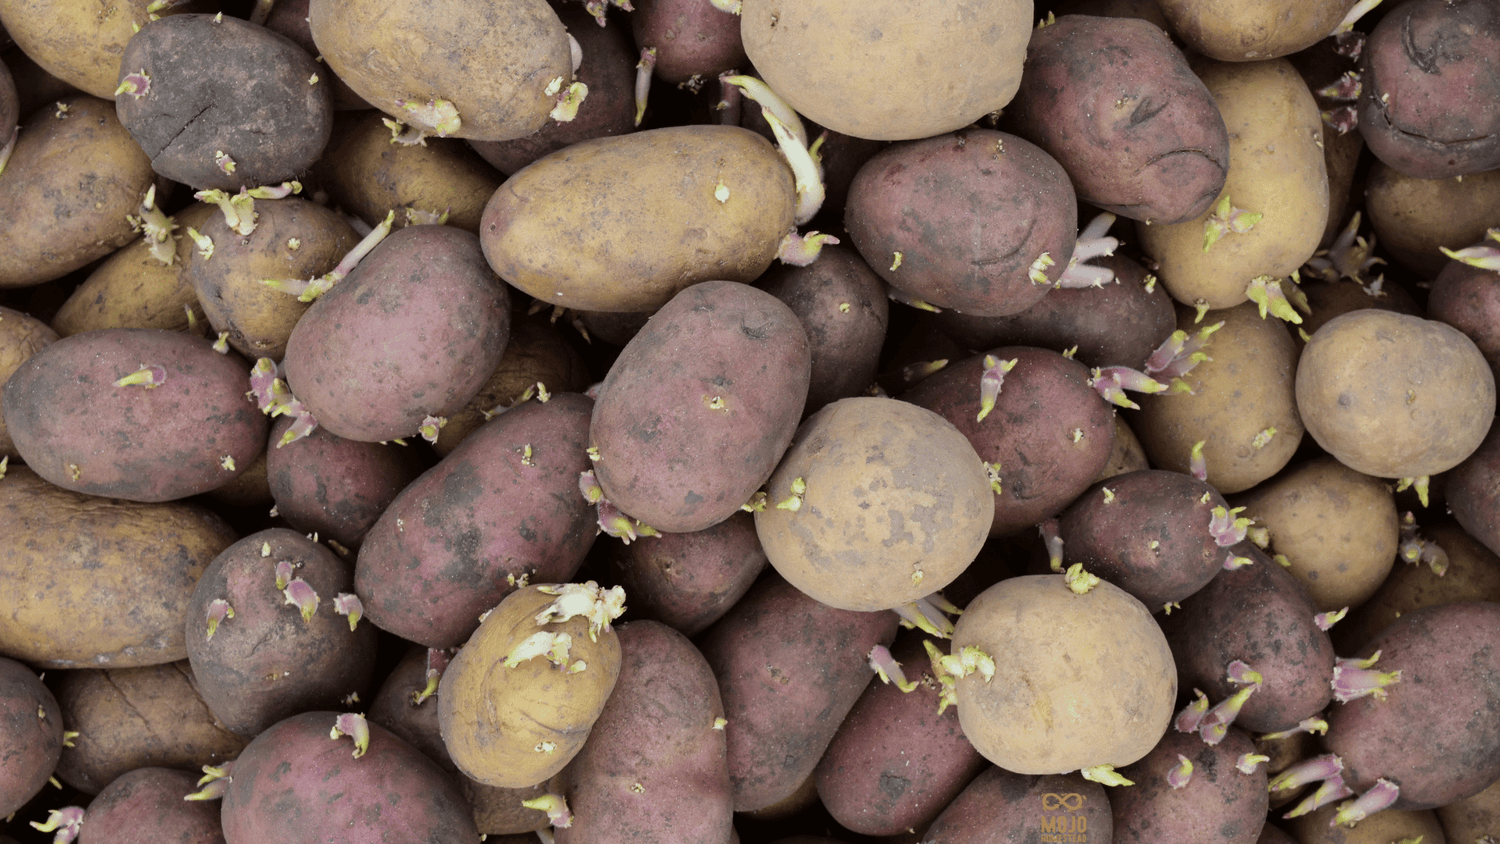
Start With the Eyes
Potatoes grow from seed potatoes — and what you're looking for are the "eyes." Those little dimpled sprout points on the surface.
Each eye can grow into a new plant, so when you're choosing your seed potatoes, look for ones with healthy eyes that are just starting to sprout.
Can you use supermarket potatoes? Sometimes, yes — but supermarket spuds are often treated to prevent sprouting, which makes them unreliable.
Seed potatoes from a garden centre or produce store are a much safer bet. They're bred specifically for growing and the results are consistently better.
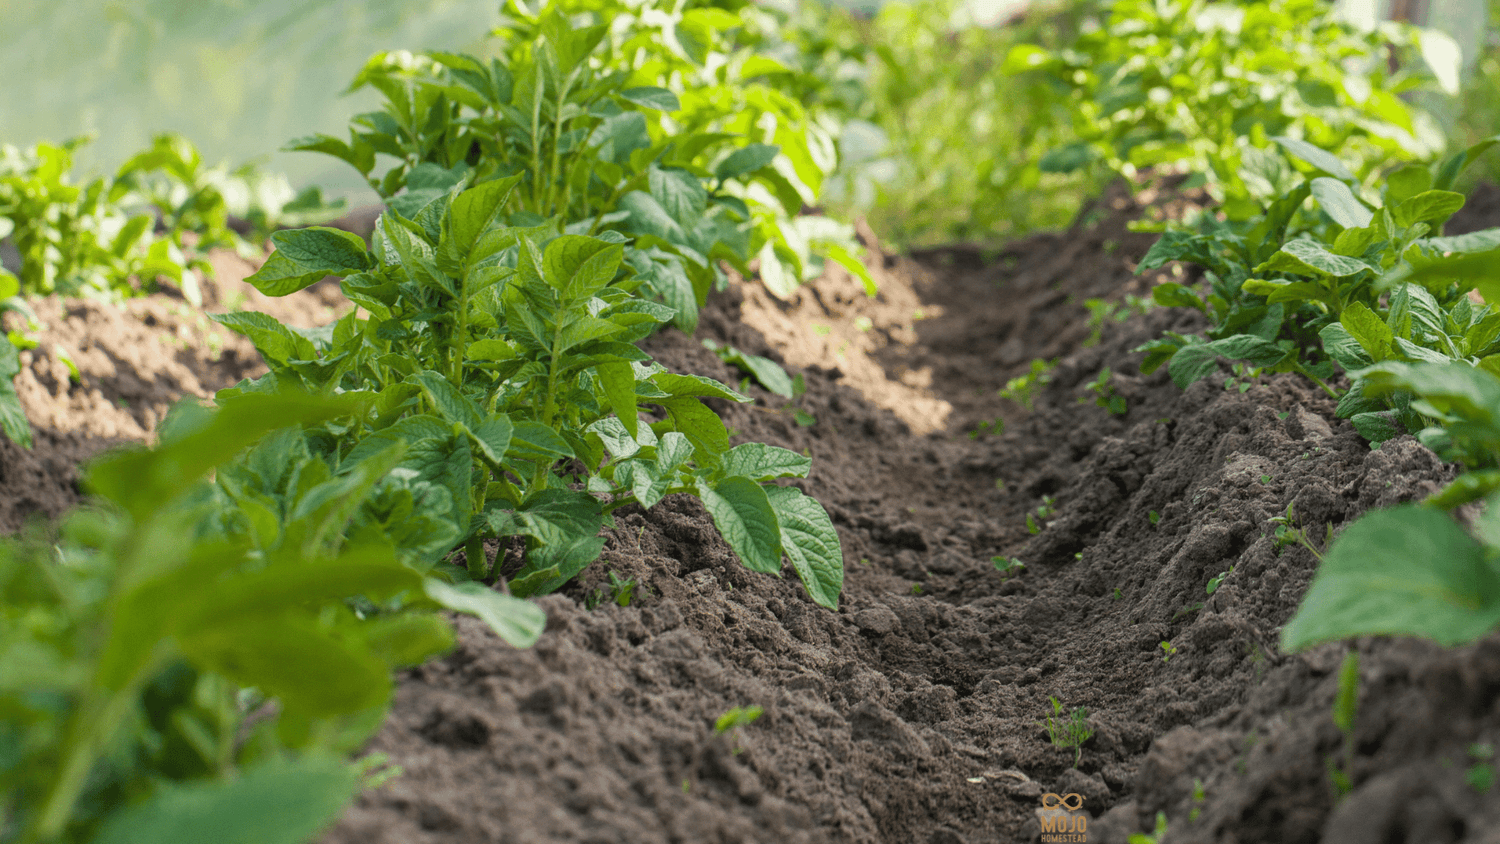
How to Plant
Dig a trench or hole about 10–15cm deep. Place your seed potato in with the eyes facing up and cover with just a light layer of soil — around 5–8cm.
Don't bury it deep straight away.
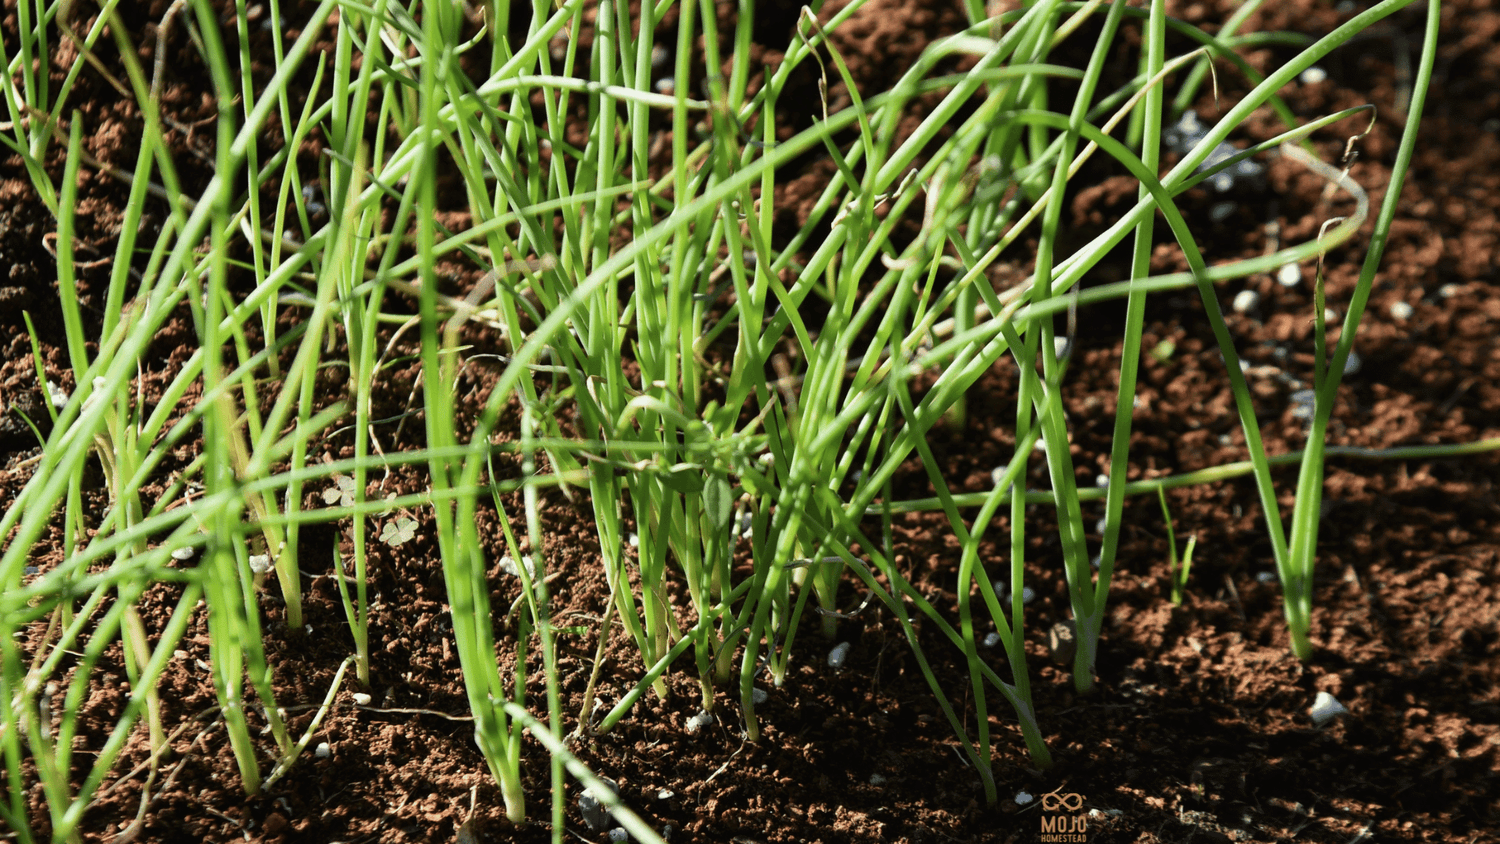
Then, as the shoots start to emerge, keep mounding soil up around the stem. This is called hilling up, and it's the secret to a big harvest.
Every time you see green shoots, cover most of them back up with more soil or straw. The buried stem produces more potatoes along its length — so the more you build up, the more spuds you get.
It sounds counterintuitive, but trust the process.
Watering
Potatoes do not like sitting in wet soil — they'll rot. Water them in when you plant, then largely leave them alone.
Once they're growing, water when the soil is dry but don't overdo it. If you're getting decent autumn rain, you probably won't need to water much at all.
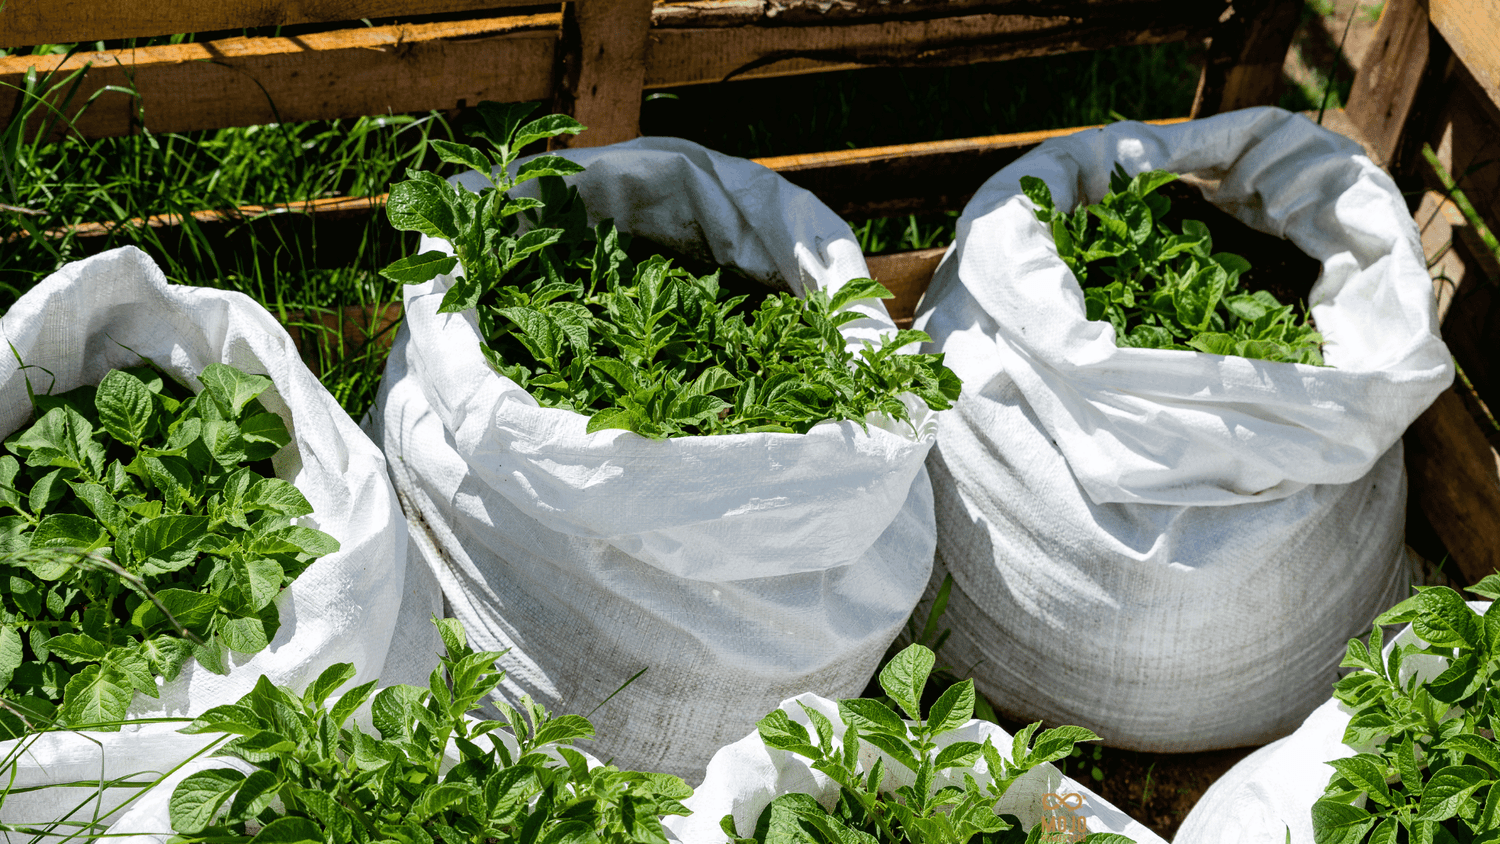
No Garden Bed? No Problem
Potatoes grow brilliantly in large pots, buckets, or old feed bags. Same principle — light cover, hill up as they grow, don't overwater.
It's one of the most beginner-friendly crops you can grow in a small space.
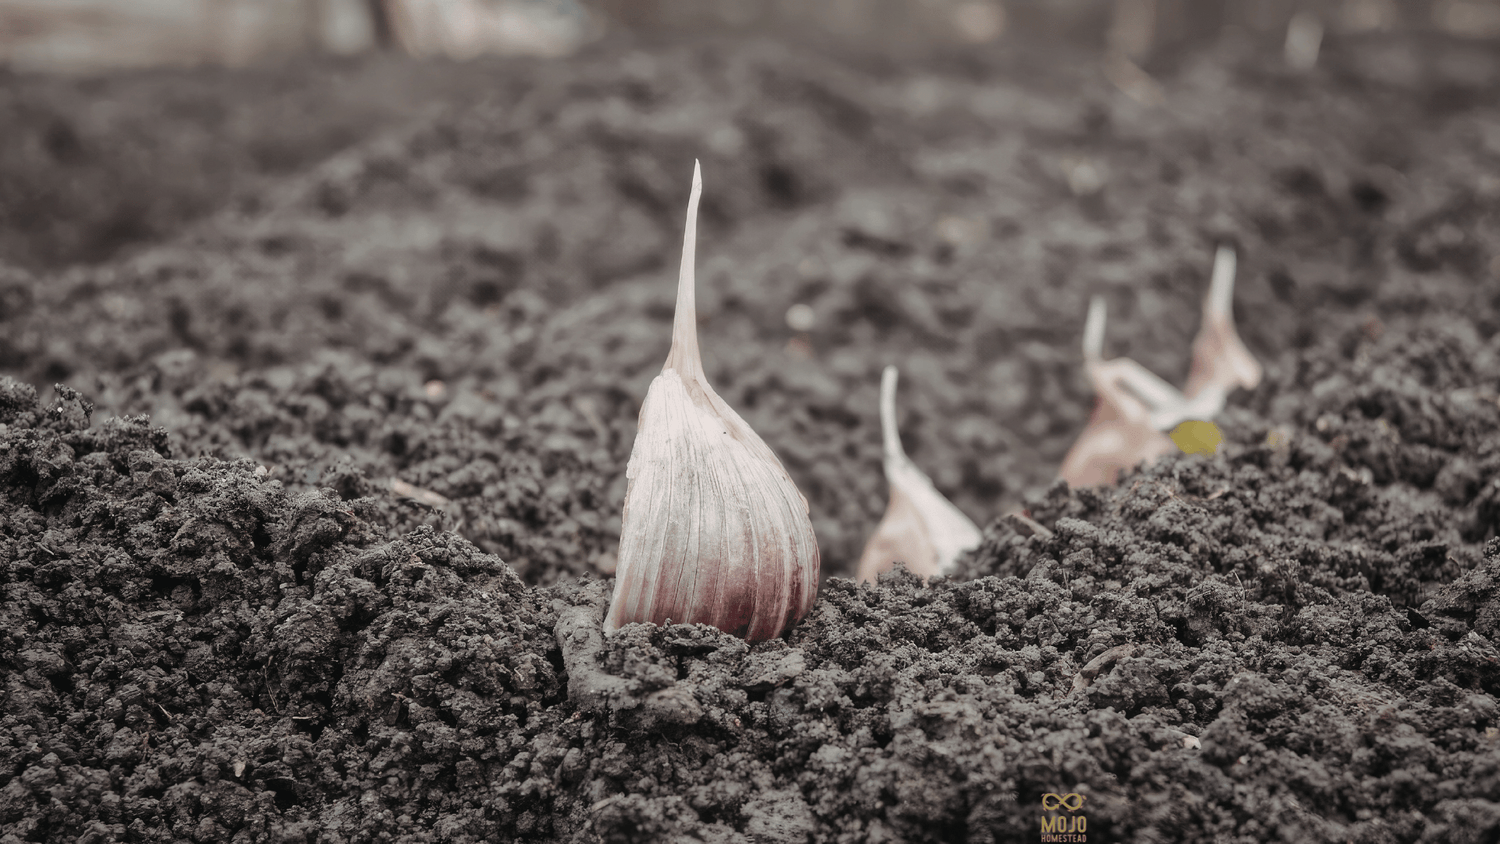
Garlic: Put a Clove In, Get a Bulb Back
Garlic is almost too easy. You put a clove in the ground, come back in eight months, and pull out a full bulb.
It's one of those crops that makes you feel like you actually know what you're doing.
Step-by-Step
Break the bulb into individual cloves. Don't plant the whole bulb. Separate it just before planting — not weeks ahead, just before you go out to the garden. Each clove becomes one full bulb.
Plant pointy end up. The pointy end is the top, the flat end is the base where the roots come from. Pointy end up, every time. Sounds obvious, but it's easy to get confused when you're planting a whole row.
Depth and spacing. Plant each clove about 5cm deep and roughly 15cm apart. Give them room — crowded garlic makes small bulbs.
Soil matters. Garlic wants loose, well-fed soil with good drainage. It does not like sitting in wet, compacted ground. If your soil is heavy clay, work some compost through before you plant. Your garlic will thank you.

Buy Proper Seed Garlic
Supermarket garlic is often treated to prevent sprouting and may be imported from overseas — meaning it's not suited to your local conditions.
Seed garlic from a nursery or produce store isn't expensive, and the difference in results is absolutely worth it.
Onions: Seeds vs Sets (And Why Beginners Should Always Choose Sets)
Onions are brilliant, but there's a choice to make upfront.
Sets are small, partially grown onion bulbs. You pop them in the ground and off they go. Easier, faster, and much more beginner-friendly.
Seeds are cheaper — a packet costs less than a bag of sets — but they take longer and need more attention early on. You'll start them indoors or in a sheltered spot, then transplant once they're big enough. Totally doable, just more steps.
My recommendation for beginners: sets. Every time.
A Quick Note on Varieties
Onions are triggered to form bulbs by day length.
In Australia, you generally want short-day or intermediate varieties for autumn planting. If you're buying from your local nursery or produce store, you're probably already getting the right thing — they stock what suits your region.
Just don't order from an overseas seed catalogue without checking the variety suits Australian conditions.
Winter Care: Mostly Just Leave Them Alone
Here's the good news — once these three crops are in the ground, winter care is minimal. This is genuinely a set-and-mostly-forget situation.
Watering. All three are pretty drought tolerant once established. In most parts of Australia, winter rainfall will do most of the work. The main thing to avoid is waterlogged soil, especially for garlic. If you're getting a lot of rain, make sure your beds drain well.
Weed control. This is the big one. Weeds compete for nutrients and water and can really set your crop back. A layer of mulch around your plants when you put them in will save you a lot of work. Check every couple of weeks and pull anything that sneaks through — it doesn't take long but it makes a real difference.
Feeding. Don't overdo it. If you've prepped your soil well with compost before planting, you're probably set. Too much nitrogen pushes leafy top growth at the expense of the bulb. Resist the urge to keep feeding and let them do their thing.
Common Mistakes (So You Don't Have to Make Them)
Planting supermarket garlic. It might grow — sometimes it does — but it's unreliable. Spend a few dollars on proper seed garlic and you'll have a much better result.
Skipping soil prep. Loose, well-drained, compost-rich soil is the goal for all three of these crops. Shoving them into hard, compacted, nutrient-poor ground will give you small, disappointing results. Ten minutes of prep before planting makes a massive difference.
Crowding your plants. It's tempting to squeeze more in, especially in a small space — but crowded plants compete for nutrients and produce smaller bulbs. Stick to the spacing: 15cm for garlic and onions, around 30cm between potato plants.
The Harvest (The Best Part)
This is why these crops are worth it. The harvest is genuinely satisfying every single time.
Garlic
Watch the tops. When the lower leaves start to die back and go brown — usually around late spring to early summer — your garlic is ready.
Don't wait until all the leaves are dead. Harvest when about half have died back. Loosen the soil with a fork and lift the bulbs out gently. Don't pull by the tops or you'll snap them off.
Onions
When the tops flop over and start to dry out, that's your signal. Loosen the soil and lift carefully.

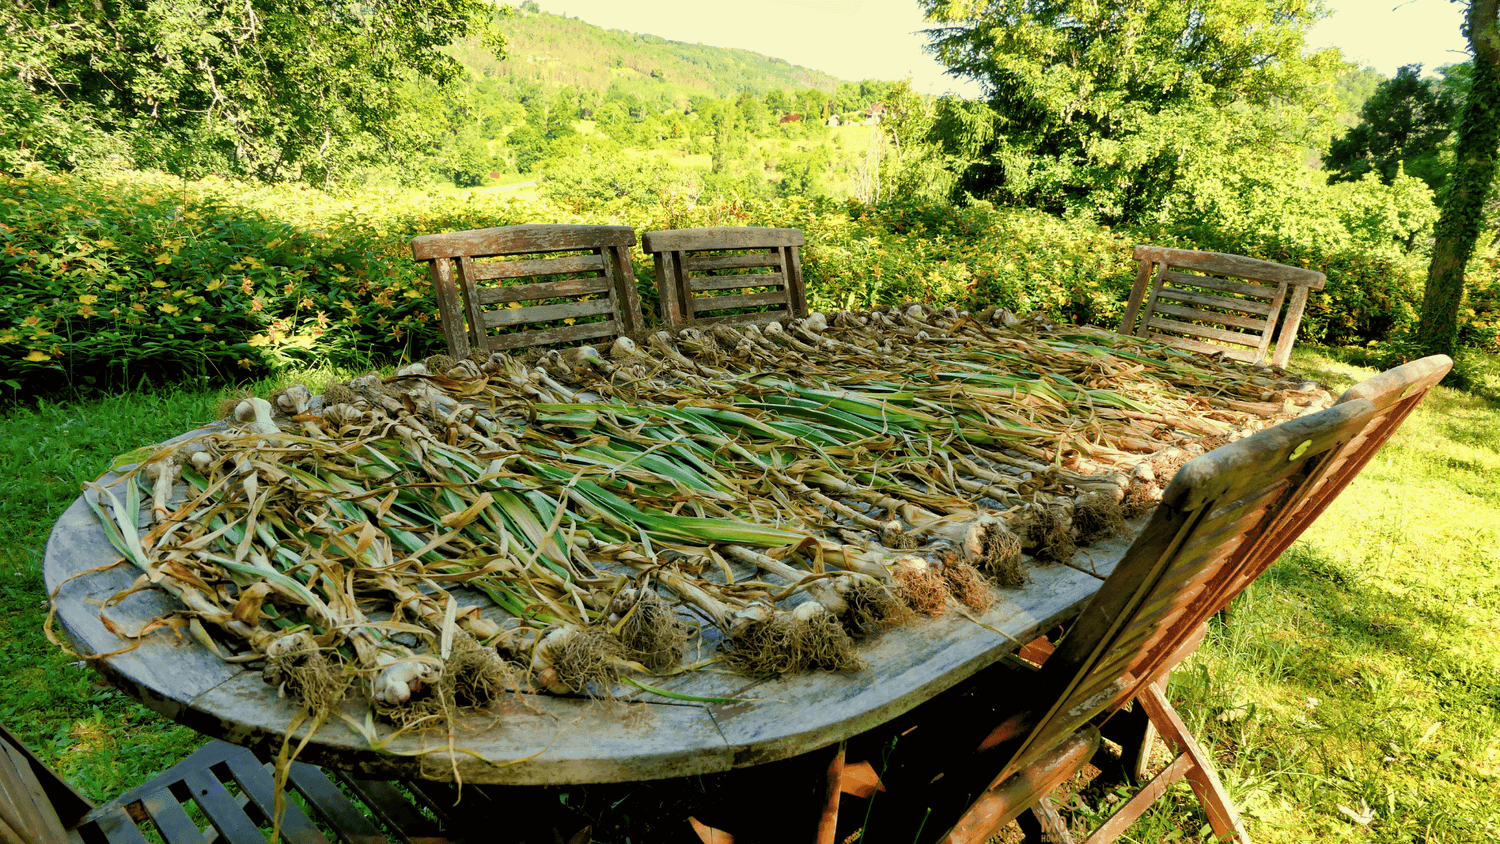
Curing and Storage
Both garlic and onions need to be cured before storage. Lay them out in a single layer in a warm, dry, well-ventilated spot — out of direct sun — for two to four weeks.
Once the outer skins are papery and dry, they're ready to store somewhere cool, dark, and dry.
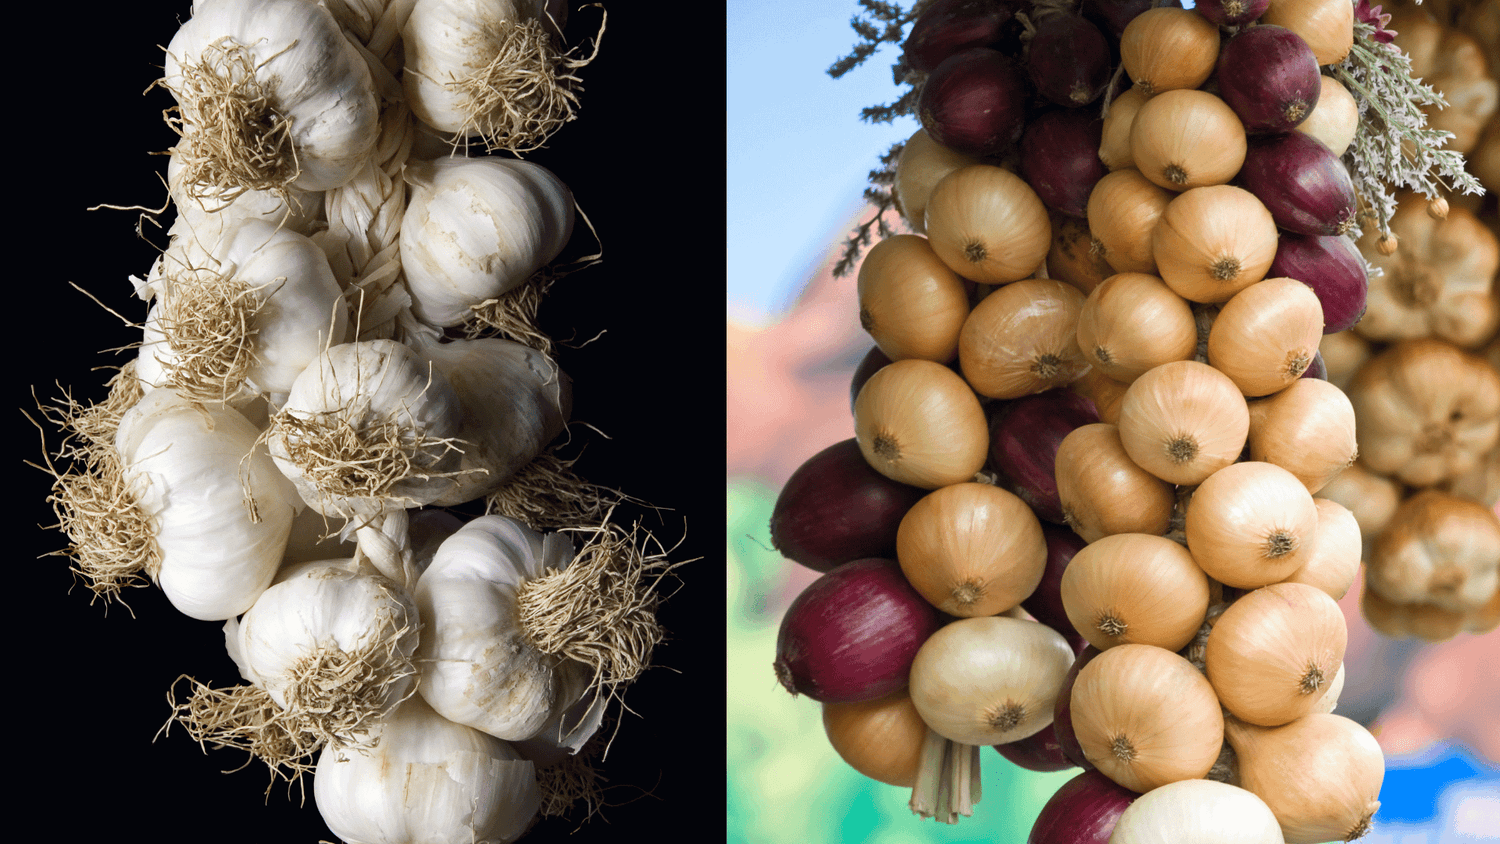
Done right, garlic will last six to twelve months.
Onions, three to six months.
That is a serious dent in your grocery bill.
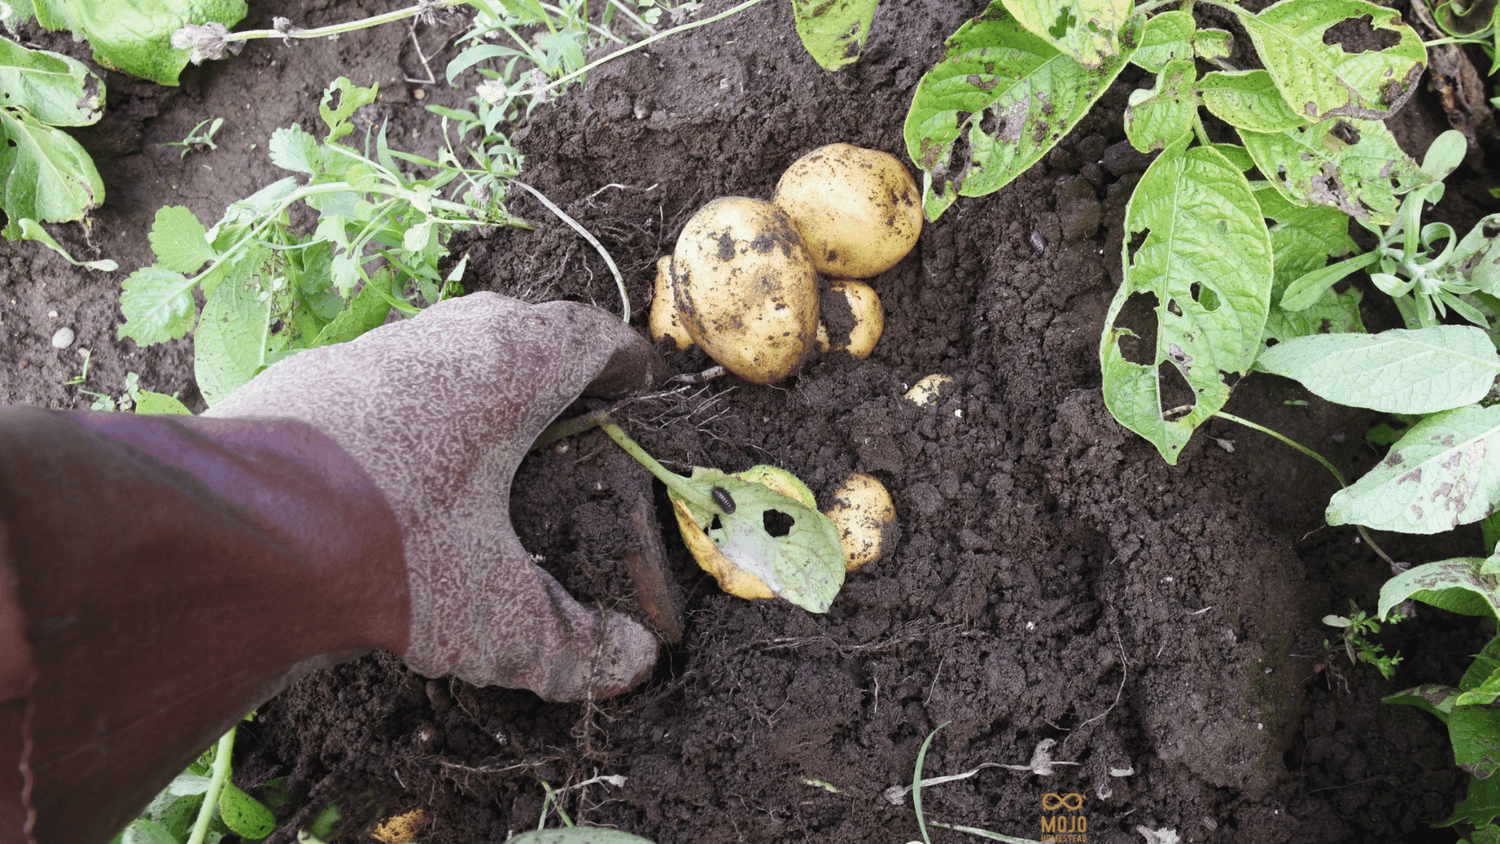
Potatoes
Harvest when the tops die back completely. Use a garden fork rather than a spade — you're less likely to spear your spuds.
Let them dry out on the surface for a few hours before storing in a cool, dark, dry place.
Keep them out of the fridge and away from light, or they'll go green.
The Bottom Line
These three crops are the definition of a set-and-forget win. You put in a bit of effort now, in autumn, and come back in spring and summer to a harvest that stocks your pantry for months.
That's what Ditch the Store is all about. Not doing everything at once. Just picking the right things, at the right time, and letting nature do most of the work.
Start with one bed. Plant garlic, throw in some onion sets, mound up a few potatoes. See what happens. You'll be hooked.
Ready to go deeper? The Ditch the Store book series walks you through the whole homesteading picture — step by step, in plain language, from someone who's actually doing it. Head to mojohomestead.net for the full range. And jump on the weekly email list for seasonal tips and what's happening on the farm — link in the show notes.


BY MOJO HOMESTEAD